How to add a Calendar Events Widget into Your Website
Share:

How to add a Calendar Button into Your Website

Discover our intuitive calendar events widget for effortlessly organizing and showcasing upcoming events on your website.


Contents

Fouita’s dynamic Calendar Events widget
Key features of our Event Planner
Your ideal event scheduler plugin for any website
Definitive guide to integrating Calendar Button


Fouita's dynamic Calendar Events widget:

Fouita’s Calendar Events widget offers a range of benefits that enhance both user experience and organizational efficiency. At its core, the widget provides a streamlined interface for managing and displaying events, ensuring clarity and accessibility for users seeking information on upcoming activities. Its customizable design allows businesses and organizations to seamlessly integrate the calendar into their websites, maintaining brand consistency and enhancing user engagement. Fouita’s widget also supports multiple viewing options, such as daily, weekly, and monthly calendars, catering to diverse user preferences and needs. Moreover, the widget’s responsive design ensures compatibility across various devices, offering a seamless experience whether accessed on desktops, tablets, or smartphones. By facilitating efficient event management and improving user accessibility, Fouita’s event calendar widget proves invaluable in enhancing organizational communication and promoting engagement with audiences.

Key features of our Event Planner :

  • Customization Options: Users can customize the widget’s appearance to match their website’s design and branding. This includes adjusting color schemes, fonts, and layouts to ensure visual consistency and usability across different platforms and devices.
  • Responsive Design: The widget adapts seamlessly to desktops, tablets, and mobile phones, providing an optimal viewing and interaction experience regardless of device. This enhances user satisfaction and accessibility.
  • Notification and Alerts: Users receive timely updates on event changes or new announcements via push notifications, email alerts, or in-app notifications. They can subscribe to event-specific notifications for personalized updates.
  • Social Sharing: Integrated social sharing buttons enable users to promote events across social networks like Facebook, Twitter, and LinkedIn. This boosts event visibility and encourages attendee engagement through organic sharing.
  • Analytics and Insights: Event organizers gain actionable insights such as event views, registrations, attendee demographics, and engagement levels. Advanced analytics integration supports data-driven decisions for optimizing future events and marketing strategies.
  • Performance Optimization: Optimizing performance ensures the widget loads quickly, uses resources efficiently, and maintains high usability standards. This contributes to a smooth user experience and enhances engagement with event-related content.
  • Direct Booking Links: Prepare direct booking links for each event to simplify the registration or ticket purchase process. These links, integrated into calendar buttons within the widget, minimize friction and potentially increase conversion rates by streamlining the booking journey.

Your ideal event scheduler plugin for any website:

Whether you’re planning a community event, hosting workshops, or organizing a conference, our templates offer a hassle-free solution that saves time and effort.

Our templates make it easy to integrate a professional and functional calendar onto your pages. Select the one that suits your event, personalize it as needed, and effortlessly incorporate it into your website with minimal setup required.

Discover Fouita’s event scheduler its versatile templates are compatible with WordPress, Wix, Shopify, Elementor, Webflow, and more, ensuring seamless integration across various platforms.

Simplify your site management and enhance engagement with our ready-to-use templates. Explore now to find the perfect match for your next event!

Definitive guide to integrating Calendar Button:


Step 1:Open the Editor

 
  1. 1. Go to Calendar Events template.
  2. 2. Click on “Edit” after choosing your template.
  3.  

Step 2: Add and customize events

 
  1. 1. In this panel, you can easily add and remove events as needed.
  2.  
  3.  
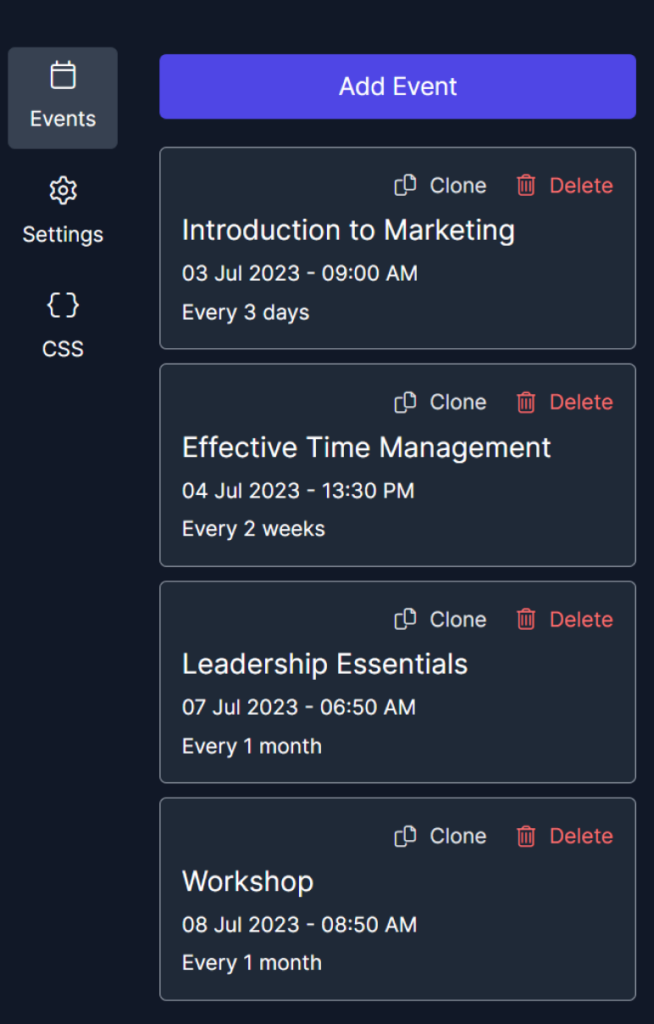
  4. 2. Customize each event by entering its name, changing colors, specifying start and end dates, selecting the repeat mode, and choosing whether to display a CTA button. Additionally, you have the option to edit the event’s title and description.
  5.  

Step 3: Configure settings

 
  1. 1. Here, you’ll handle the events settings where you can make choices regarding whether to display controls and the title, choose the default view and starting day, and specify the elements to include in the toolbar.
  2.  
  3.  
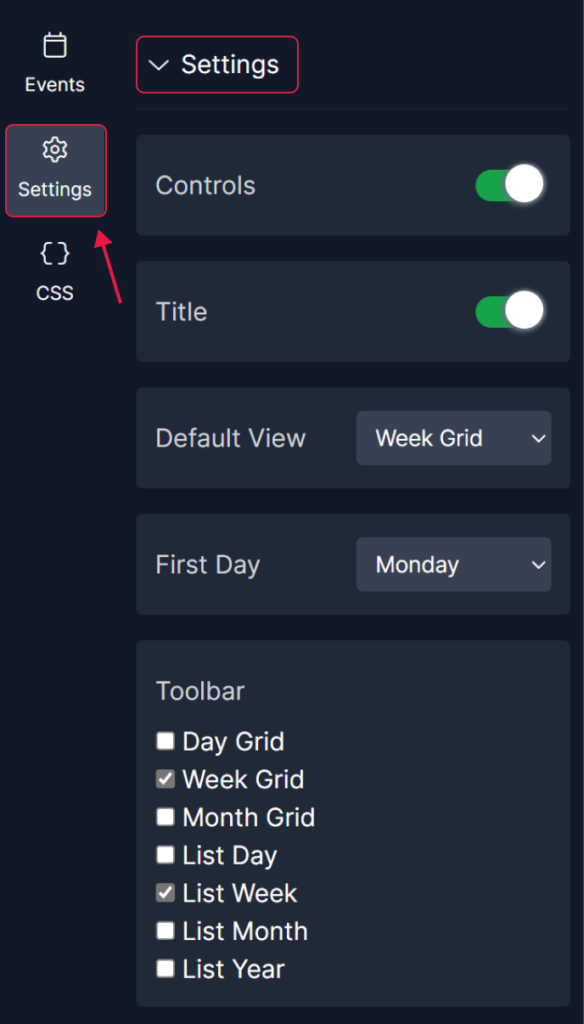
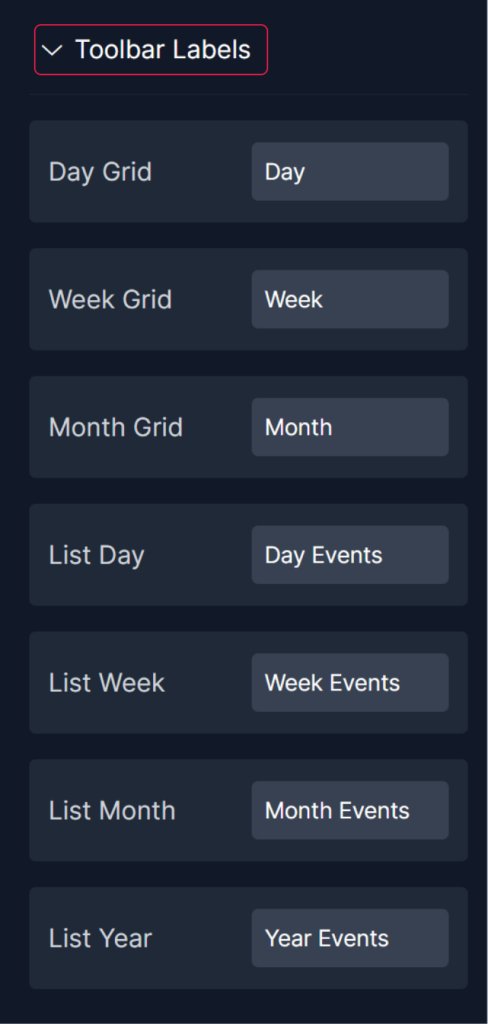
  4. 2. In this section, you will input each toolbar label.
  5.  


Step 4: Preview

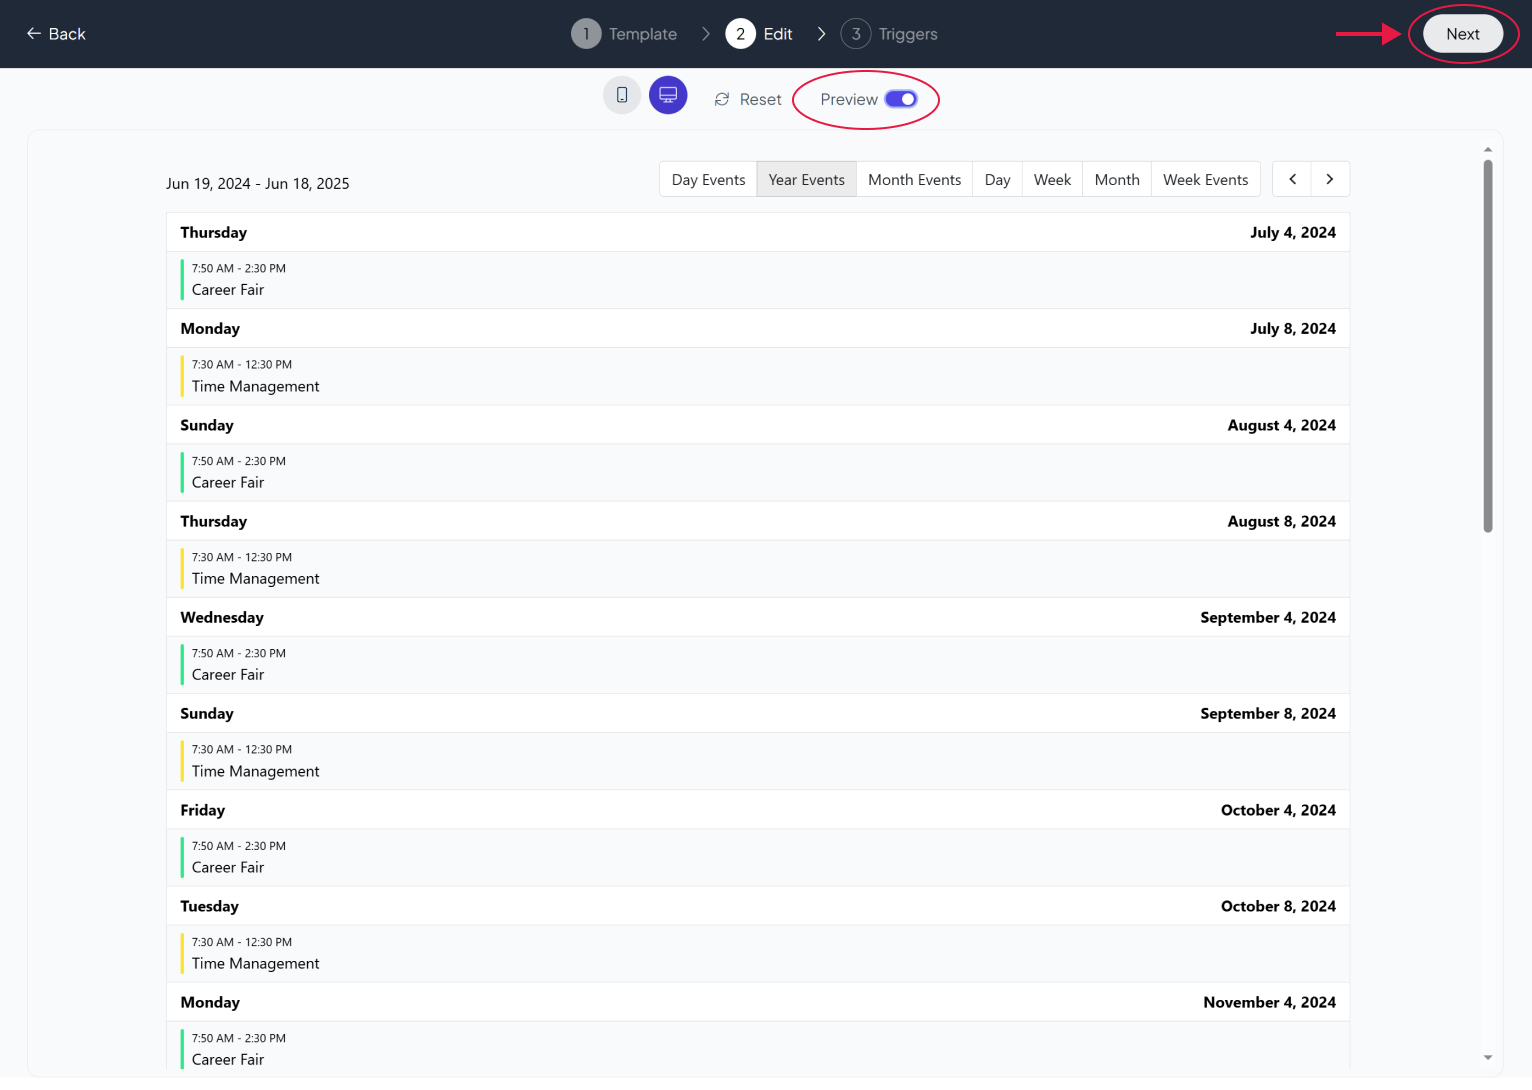
Lastly, you can click on “Preview” to see how your calendar events widget looks on both desktop and mobile devices. After this, you can proceed to the next step.


Step 5: Embed to your pages

1. Save your widget

2. Click on embed then copy the code

3. Insert the code into the section where you want the widget to appear.